reCAPTCHA is widely used and one of the most popular ways to prevent your website from spamming and abuse by preventing bots from being able to create users or while logging in.
Here for the User Registration widget, if you choose to use reCAPTCHA to protect your website.
You will need to add reCAPTCHA keys, you first need to get the reCAPTCHA keys from the Google website. We have provided integration with only the latest reCAPTCHA i.e. reCAPTCHA v3.
As the latest version is known to be easy on humans, and hard on the bots. Thereby, reducing user friction while the onboarding process.
reCAPTCHA v3
Step 1: Visit the Google reCAPTCHA site and select reCAPTCHA v3.
Step 2: Add a Label to identify this instance.
Step 3: Add a domain, e.g. www.your-site-url.com
Step 4: Enter an admin email address or add a new one
Step 5: Accept the Terms of Service and Submit.
Step 6: On Submission, you will be redirected to the next page, from their copy both the Site Key and the Secret Key.
Step 7: Add a New Page and Edit With Divi Builder
Step 8: Drag and drop the User Registration Form extension
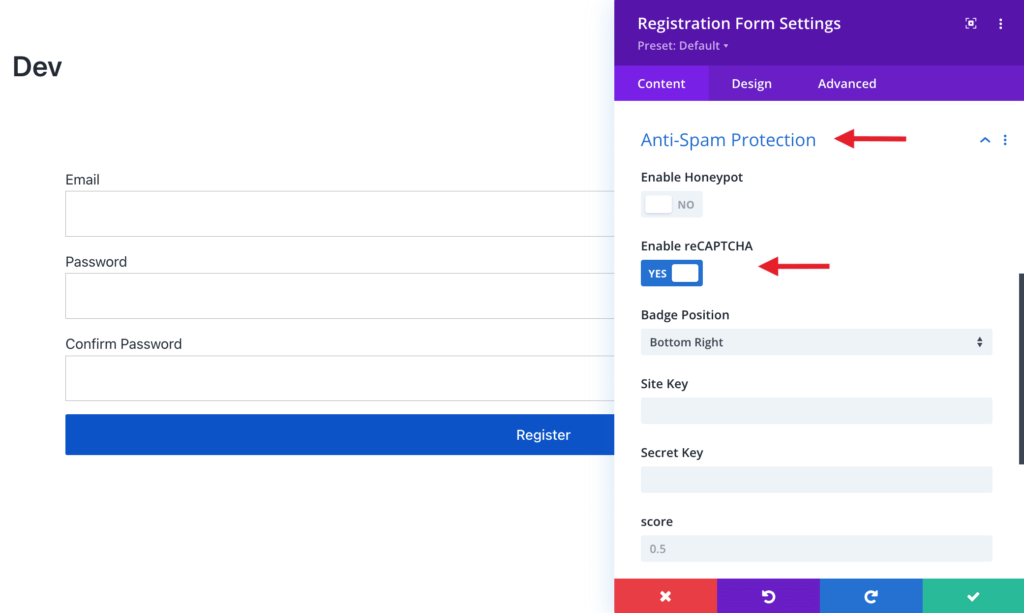
Step 9: Go to User Registration Form > Content > Anti-Spam Protection and Enable reCAPTCHA
Step 10: Enter the copied keys in the User Registration Form extension > Content tab > Anti-Spam Protection section > Site Key/Secret Key options and click Save Changes. (There’s another field to change the Score Threshold if desired. If you notice bots manage to get around the reCAPTCHA, increase the score ).
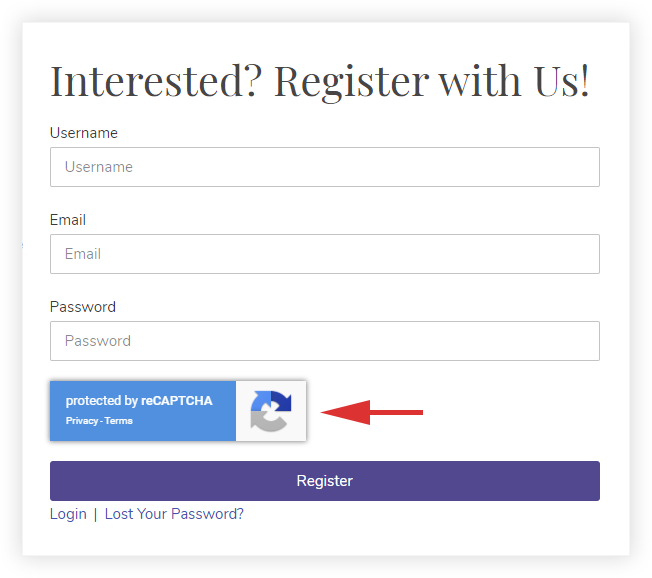
Step 11: Choose whether to place the reCAPTCHA badge to the right (bottom of the page), left (bottom of the page), or inline.
Step 12: Click Save
As per the Badge Position set, you will now see the reCAPTCHA badge. Refer to the image shown below for inline reCAPTCHA position.